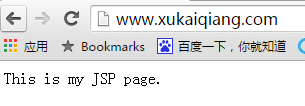
开发完成了自己的网站,可是每次访问都是通过ip进行访问的,经过26天的漫长备案,终于有了自己的域名,就进行了自己的网站的域名解析。所以在这里记录一下,特别鸣谢大师!
命令记录:
nginx -s reload 重启nginx服务(必须是你nginx目录下面执行)
nginx -t 检测配置文件(nginx.conf)是否配置成功。
nginx.conf配置如下:
user www-data;
worker_processes 4;
pid /alidata/server/nginx/logs/nginx.pid;

events {
        worker_connections 768;
        # multi_accept on;
}

http {

        ##
        # Basic Settings
        ##

        sendfile on;
        tcp_nopush on;
        tcp_nodelay on;
        keepalive_timeout 65;
        types_hash_max_size 2048;
        # server_tokens off;

        # server_names_hash_bucket_size 64;
        # server_name_in_redirect off;

        include mime.types;
        default_type application/octet-stream;

        ##
        # Logging Settings
        ##

        access_log /var/log/nginx/access.log;
        error_log /var/log/nginx/error.log;

        ##
        # Gzip Settings
        ##

        gzip on;
        gzip_disable "msie6";

        # gzip_vary on;
        # gzip_proxied any;
        # gzip_comp_level 6;
        # gzip_buffers 16 8k;
        # gzip_http_version 1.1;
        # gzip_types text/plain text/css application/json application/x-javascript text/xml application/xml application/xml+rss text/javascript;

        ##
        # nginx-naxsi config
        ##
        # Uncomment it if you installed nginx-naxsi
        ##

        #include /etc/nginx/naxsi_core.rules;

        ##
        # nginx-passenger config
        ##
        # Uncomment it if you installed nginx-passenger
        ##

        #passenger_root /usr;
        #passenger_ruby /usr/bin/ruby;

        ##
        # Virtual Host Configs
        ##
        server {
                server_name 101.200.233.73 www.xukaiqiang.com xukaiqiang.com;
                location /
                {
                        proxy_pass http://101.200.233.73:8080;
                }
        }
       # server {
       #         server_name www.xukaiqiang.com xukaiqiang.com;
       #         location /
       #         {
        #                proxy_pass http://101.200.233.73:8088;
       #         }
       # }

        include /etc/nginx/conf.d/*.conf;
        include /etc/nginx/sites-enabled/*;
}
然后Tomcat中的server.xml文件需要在host下面配置一个Context